
SCENARIO
You want a quick walk through on how to setup MDT 2013 Update 2 so that you can get started using it in your environment.
WHAT YOU WILL NEED
- A server OS - Server 2008 R2 or higher. We will be using Server 2012 R2 in this scenario.
- Windows Deployment Services role installed on our server.
- Download MDT 2013 Update 2. You can find it here.
- Download Windows ADK for Windows 10. You can find that here.
- Client OS (Win7, Win8, Win10) - whatever you plan on deploying.
- Drivers for the machines you are deploying to.
Driver Packs
Manufactures make driver packs for their various models. Use these!!!
HP WinPE Drivers - http://ftp.hp.com/pub/caps-softpaq/cmit/HP_WinPE_DriverPack.html
Lenovo Drivers - https://support.lenovo.com/cy/en/documents/ht074984
Step 1: Install WDS role
Open Server Manager, go to Manage and then select Add Roles and Features. You can do this through PowerShell as well if you know how to install server roles that way.
Go through the wizard and install Windows Deployment Services.
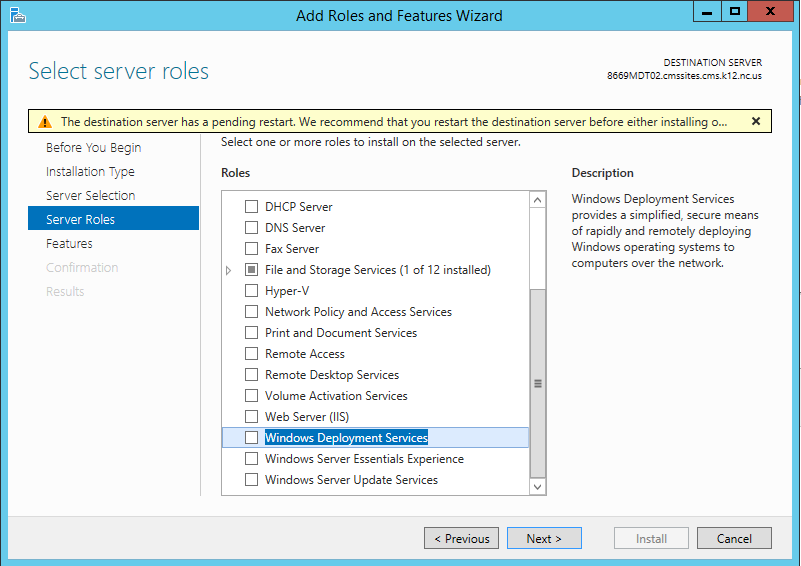
After you select Windows Deployment Services, you will be prompted to install additional features. Click Add Features.

You will eventually be asked what Role Services you want installed. Select both Deployment Server and Transport Server.

Finish the install and then reboot your server.
Step 2: Install Windows 10 ADK
Install the Windows 10 ADK. When you get to the following screen, select Deployment Tools, Windows Preinstallation Environment (Windows PE), and User State Migration Tool (USMT).

This install may take a while. Finish the install and then install MDT.
Step 3: Install MDT 2013 Update 2
Install Microsoft Deployment Toolkit. You should have downloaded the correct version (x86 / x64) onto your server. Begin the install. You can just accept all of the defaults during the installation wizard. After this, you are ready to get started with the configuration of WDS and MDT.
Step 4: Initial Configuration of WDS
Before continuing, I would recommend placing the shortcuts to the Deployment Workbench and Windows Deployment Services on your desktop or taskbar.
When you first open Windows Deployment Services, you should see something like the following:

You will want to right click on your server and select Configure Server. For our purposes, we will just setup a Standalone server.

After this, you will be asked where you want to put the remote installation folder. By default, it is placed here: C:\RemoteInstall
If you have two drives, you should place this on your second drive. if you only have one drive, you can accept the default and select Next. If you save it on the volume / drive that has your OS on it, you will get the following message:

After you select Yes, you will be asked about how your WDS server should handle PXE requests. When clients PXE boot, how do you want your WDS server to respond to those requests. For our purposes, we will select Respond to all client computers (known and unknown).

When you get to the last screen, uncheck Add images to the server now.

Go ahead and finish the wizard. When you look in your WDS console now, you should see something like this:

For now, we will leave WDS, and work in MDT to create our boot.wim. But when we finish that, we will come back and import our newly created boot.wim.
Step 5: Initial Configuration of MDT
Open the Deployment Workbench. You should see something like this:

We will now create our deployment share. This will be where MDT stores all of its stuff (boot files, application files, driver files, task sequences, etc.)
The default location will be C:\DeploymentShare and the default share name will be DeploymentShare$. This share should be on it's own disk if possible. Additionally, the share should be a hidden share ($).
You then have the option to give the share a description.
On the next screen, you have various options. You can select what you like here. For our purposes I am going to uncheck everything.

Go ahead and finish up the wizard.
Step 6: Create Boot.wim in MDT
While we are still in MDT, we will need to do the following:
- Download and import the WinPE drivers
- Create a selection profile for the WinPE drivers.
- Create the boot files.
In this example, I am going to download the WinPE drivers for Windows 10 (we used Windows 10 ADK so we need the WinPE 10 drivers) from HP. This is the case even if you are deploying Windows 7 or 8 to your clients. These drivers are for the WinPE environment, not for your desktop / laptop images.
So let's go to: http://ftp.hp.com/pub/caps-softpaq/cmit/HP_WinPE_DriverPack.html

Download the Softpaq.Exe and extract the files. If you look at the extracted files, you will see network and storage drivers. We need to inject these drivers into the WinPE boot image so that when it loads on your machines, it has the appropriate network and storage drivers.
Now that we have them downloaded and extracted, we want to create a folder for those drivers and them import them into that folder.

Right click on Out-of-Box Drivers and select New Folder.
In the wizard, give the folder the name: WinPE Win10x64
Complete the wizard.
Now right click on the newly created folder and select Import Drivers.

Navigate to the folder where you extracted the WinPE drivers to. You don't need to check the Import drivers even if they are duplicates of an existing driver box as this is the first set of drivers we are importing.

Finish the wizard. You should now see the drivers in the middle pane.

Now we will create a Selection Profile and then we will select these drivers to be part of that selection profile. What this lets us to is to select different drivers to be used for different purposes. If you have used SCCM, then you can think of the Selection Profile almost like a driver package. We create it and then tell MDT to use only drivers in this Selection Profile when injecting drivers into the WinPE WIM.
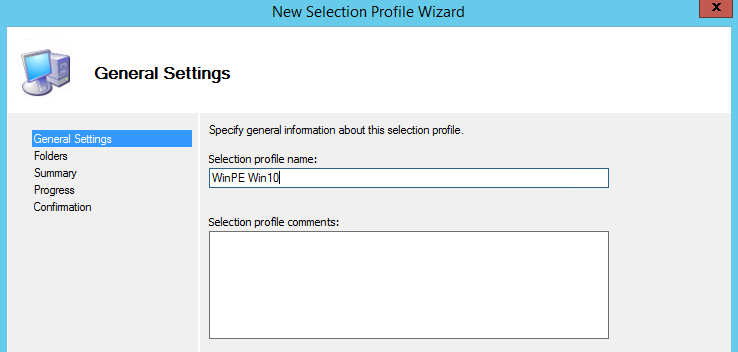
Under Advanced Configuration, right click on Selection Profiles and select New Selection Profile.

Give your Selection Profile a meaningful name.
Next select the imported drivers that you just setup.

Finally, go ahead and finish up the wizard. You should now see the Selection Profile that you created.

Now let's configure out Deployment Share properties. So right click on MDT Deployment Share and select Properties.
On the first tab, the General tab, place a check by Enable multicast......

Now go to the Windows PE tab. Under the Windows PE tab go to the Drivers and Patches tab. You should see "Selection Profile" under that tab. Use the pull down menu to select the WinPE Selection Profile that we created earlier.

You are going to be creating two boot.wim files. This properties dialogue box helps you configure both of those files. So be sure to select options for both .wim files under Drivers and Patches.

Now let's go to the Monitoring tab to enable monitoring.

Now click OK to apply all of the settings we just made to the Deployment Share Properties.
We are now ready to create our boot.wim files. Right click on MDT Deployment Share and select Update Deployment Share.

When the wizard opens, just accept all of the defaults and finish the wizard. During the wizard, you should see MDT making updates to the WinPE wim file. It will inject drivers, add needed feature packages (components) and configuration information into the .wim files.
Step 7: Add Boot Image to WDS
We will now go back to WDS to add the boot image that we just created. So open up your Windows Deployment Services console and right click on Boot Images and select Add Boot Image.

In the wizard, select the LiteTouchPE_x64.wim file from the .\DeploymentShare\Boot directory.

Finish up the wizard. You should now be able to see the added boot image.

Finally, if you check in WDS and you don't see anything under Multicast Transmissions (see image below) then you can run a command to fix this.

If you don't see anything here, run this cmd:
wdsutil.exe /new-namespace /FriendlyName:"Microsoft
Deployment Server" /NameSpace:DeploymentShare$ /ContentProvider:WDS
/ConfigString:c:\DeploymentShare /NameSpaceType:AutoCast
This concludes the basic setup of MDT 2013 Update 2. There are lots of features you can mess with as you go along, but this should get you up and running.
The next thing to do is to add your operating systems, drivers, applications, and task sequences.
Additional External Resources
Microsoft MDT Team Blog - https://blogs.technet.microsoft.com/msdeployment/Microsoft MDT Documentation - https://technet.microsoft.com/en-us/library/dn781292.aspx
Install and Configure MDT - http://blog.itvce.com/2013/10/27/installing-and-configuring-microsoft-deployment-toolkit-mdt-2013-on-windows-server-2012-r2/
Install and Configure MDT - http://philipflint.com/2013/12/29/install-and-configure-mdt-2013/
No comments:
Post a Comment